Process:
I started noticing more and more air getting sucked into my pool pump and it was getting to the point where half the skimmer was air and the other half was water so I decided to investigate where the air was entering the system.
After taking apart the only three joints between the pool and the pump I quickly found that the ABS adapter that screws right into the pool pump had developed stress cracks letting in the air. Unfortunately, our pool shop had just closed 10 minutes earlier and I wanted to have this taken care of before the end of the night (and I wanted to tinker around in the shop) so I decided I was gonna make use of a piece of 4" ABS I had in my stash along with my metal lathe which I hadn't used for some time.
The process was fairly simple and cutting the ABS was really easy on the lathe. The only issue was that I accidentally made one of the walls too thin (0.056" instead of 0.100") and had to chuck the part in the trash because it was flexing and ripping. That was a bit of a bummer, cost me 4" of the ABS and about 90 minutes but I did learn another valuable lesson: leave enough "meat"!
The second part went quite a bit quicker. Here are the steps I followed:
1. Cut 4" of 4" diameter ABS on my Metal Band Saw
2. Chuck the ABS and face one side
3. Turn it down to 3" for the last 0.750" closest to the head stock
3. Turn it down to 1.500" for the next 1.500"
4. Turn it down to 1.375" for the last 1.500"
5. Drill a hole to 1.000"
6. Flip it around and bore it to 1.250" for about 2.000" deep
7. Bore it to 2.000" for about 0.500" deep
8. Cut an o-ring groove 0.100" from the outside diameter, 0.080" deep and 0.100" wide
9. Flip the part around and taper both stages with a 2.5 degree angle
Now I have a very solid replacement ABS adapter that will never break again. EVER!
Videos:
Pictures:
The pool adapter
Close-up of the cracks that developed (center picture)
Back side of adapter with o-ring groove
Cutting the ABS on the metal band saw
Facing the piece
Turning it down to size
Drilling at 1.000"
Some of the "chips"
Boring the inside (this is where I went too deep)
Cutting the o-ring groove
With the installed o-ring
Turning down to size
Cutting the taper
Second try
Back side of the second version
I accidentally dropped the o-ring and didn't notice it until about an hour later. I was so glad I found it (top left of picture)
O-ring on top of the ABS "chips" to demonstrate how it would have been impossible to find if it hadn't fallen down to the side
Process:
My daughter's bike had been flat for some time and I finally got around to have a look at it.
After taking the tire off and inflating the inner tube I quickly located the leak close by the valve stem. I hauled out my bike tire fixing kit, roughed up the surface and stuck one of those patches on it. I wasn't quite sure if it was gonna work because I grew up using the good-ol glue and rubber patch and as I expected, after I put everything back together it was still leaking.
So I took off the tire once more and used the "real" stuff, scruffed up the inner tube, slathered on some high-VOC glue (the good stuff) and put on a rubber patch.
After putting it all back together, blowing up the tire and testing for leaks it was fixed. Now, I have to say, right after I put the tire back together and tested for leaks with a soap-and-water solution it was still giving me some bubbles but I figured it was just some air that was trapped between the tire and the inner tube. A few days later I checked the tire and it was still holding the air so I knew I was good to go. Now she's able to happily drive around again!
Pictures:
The bike before I took off the tire
Using a $15 bike repair kit, I removed the tire from the rim
Close-up of the bike repair kit
locating the leak in the inner tube
The bubbles mark the spot
Circling the leak
Putting on the rubber patch (2nd try)
Another view
The second kit I used
Escaping air that was trapped between the tire and the inner tube
Another view
Close-up of the tire size
Tools:
Bike repair kit
Adjustable wrench
Materials:
Bike repair kit
Cost:
$0.00
Time:
1hr
Savings:
$25.00
Conclusion:
Air is still holding after a few weeks
Difficulty Level (Easy, Medium, Hard, Insane):
Medium
Process:
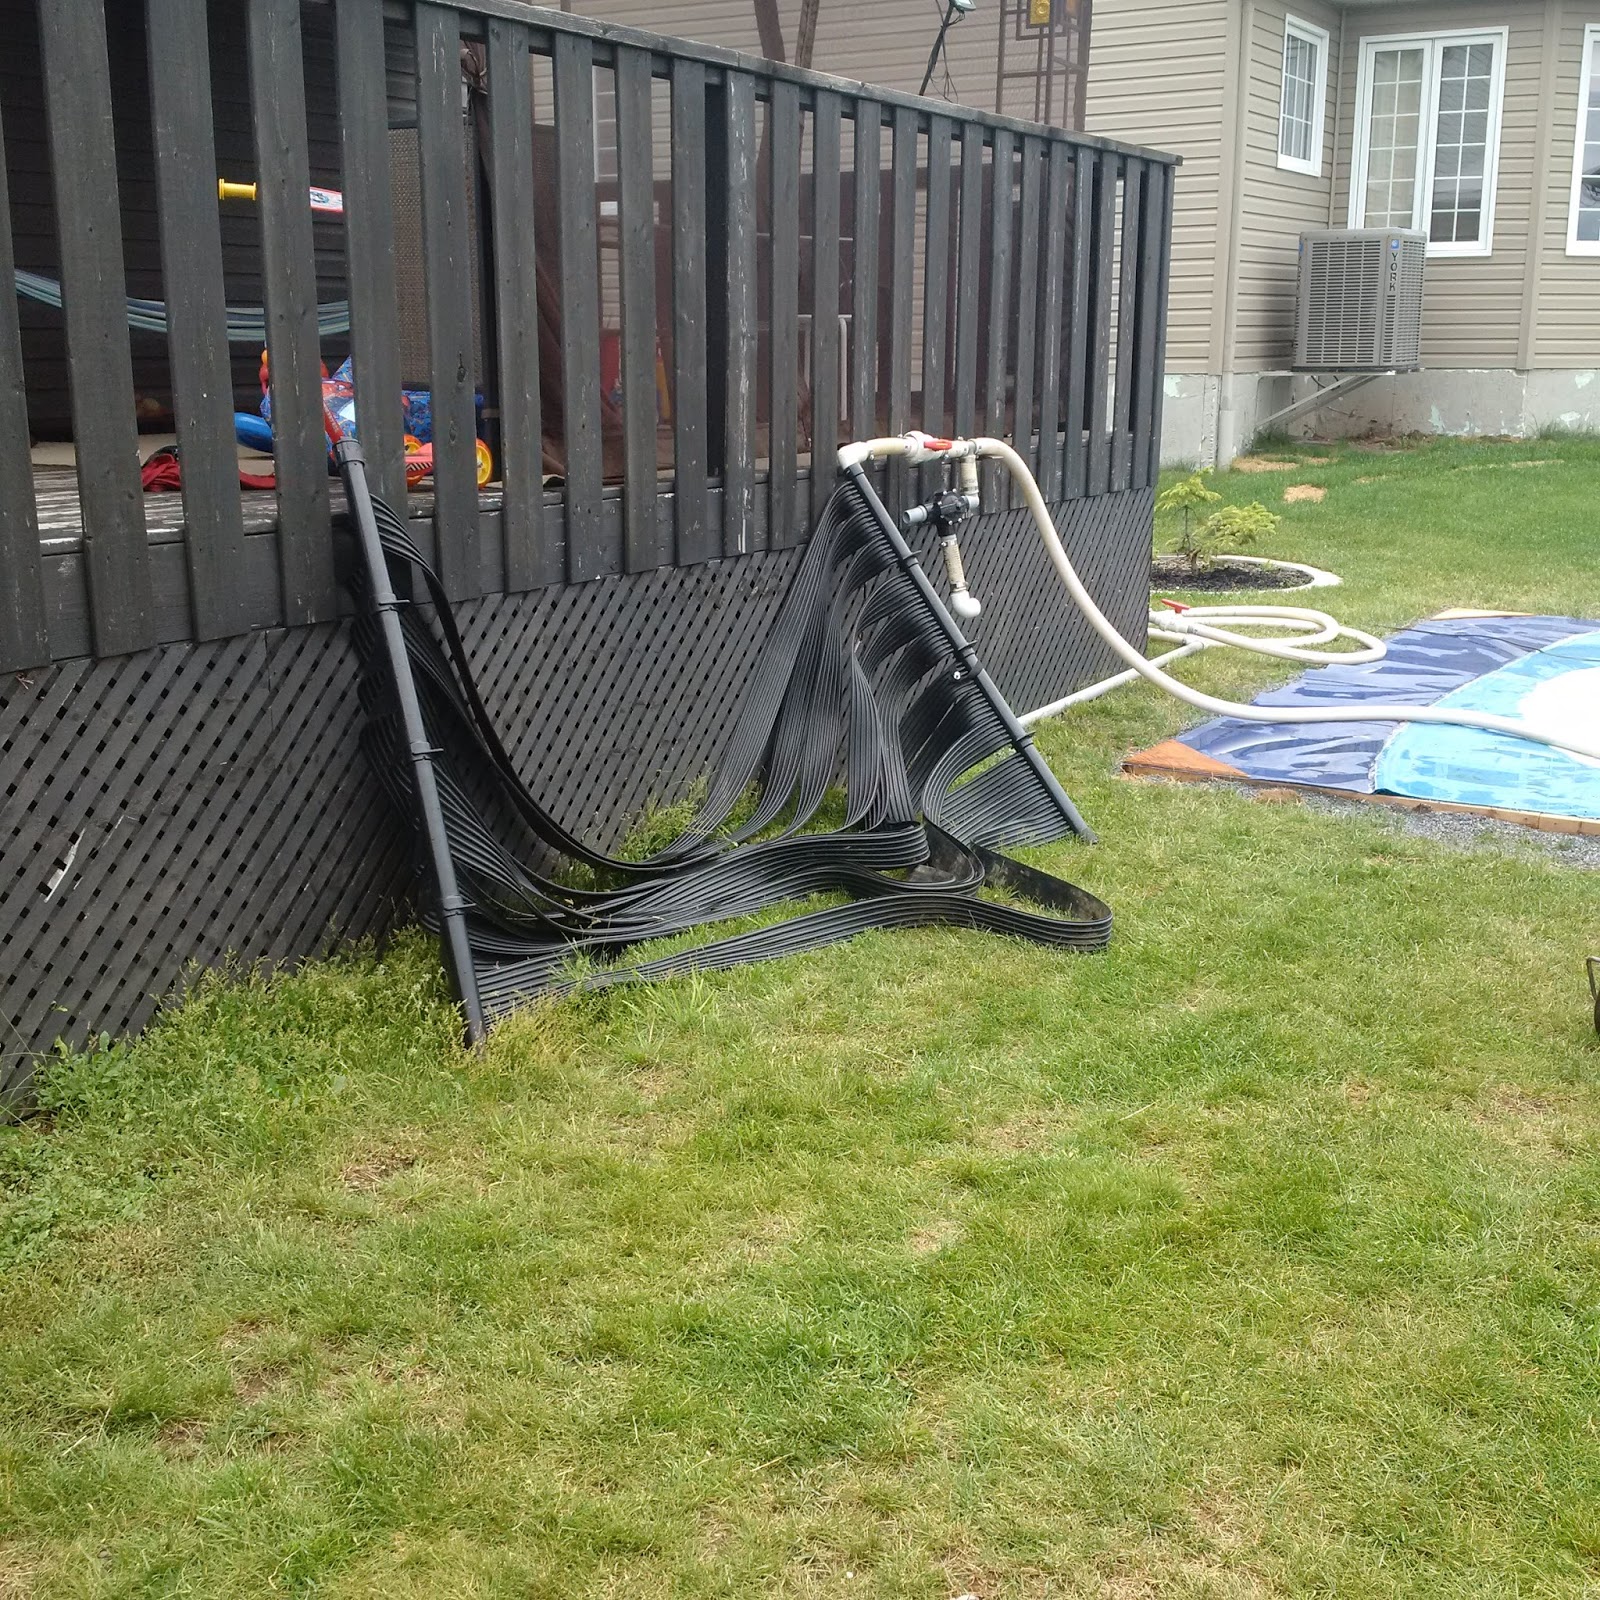
Once I had finished Preparing a Base for our Above Ground Pool, I started the process of hooking up our 4 foot by 10 foot solar heater. The solar heater and pipes came with the pool but it needed some fairly major modifications to make it fit my setup.
The solar heater required a base tilted at a 45 degree angle to get the most sun out of it which was built with simple 5/4 by 4 deck boards (1" by 3.5") to which I nailed several 1 by 6 fence boards equally spaced apart.
One of the more challenging parts was to remove the original glued ABS and PVC fittings. A simple trick was to cut the fitting off, letting about a 1/4" stick out at the top, then smearing it full of ABS, PVC or transition cement and lighting it on fire. Because the glue/cement was only put on the part to be removed, that was the only part that was charred. The fire softened the old fitting and the glue which allowed for a a simple twisting off with a pair of needle nose pliers.
The trickiest part by far though was one of the fittings that was glued right into the solar heater because it was not designed to be glued, but to be used with an o-ring fitting held in place by a snap ring. Once I removed the old glued part and tried to glue a new 90 degree ABS fitting it kept leaking. The leak wasn't very big but any leak was not desirable.
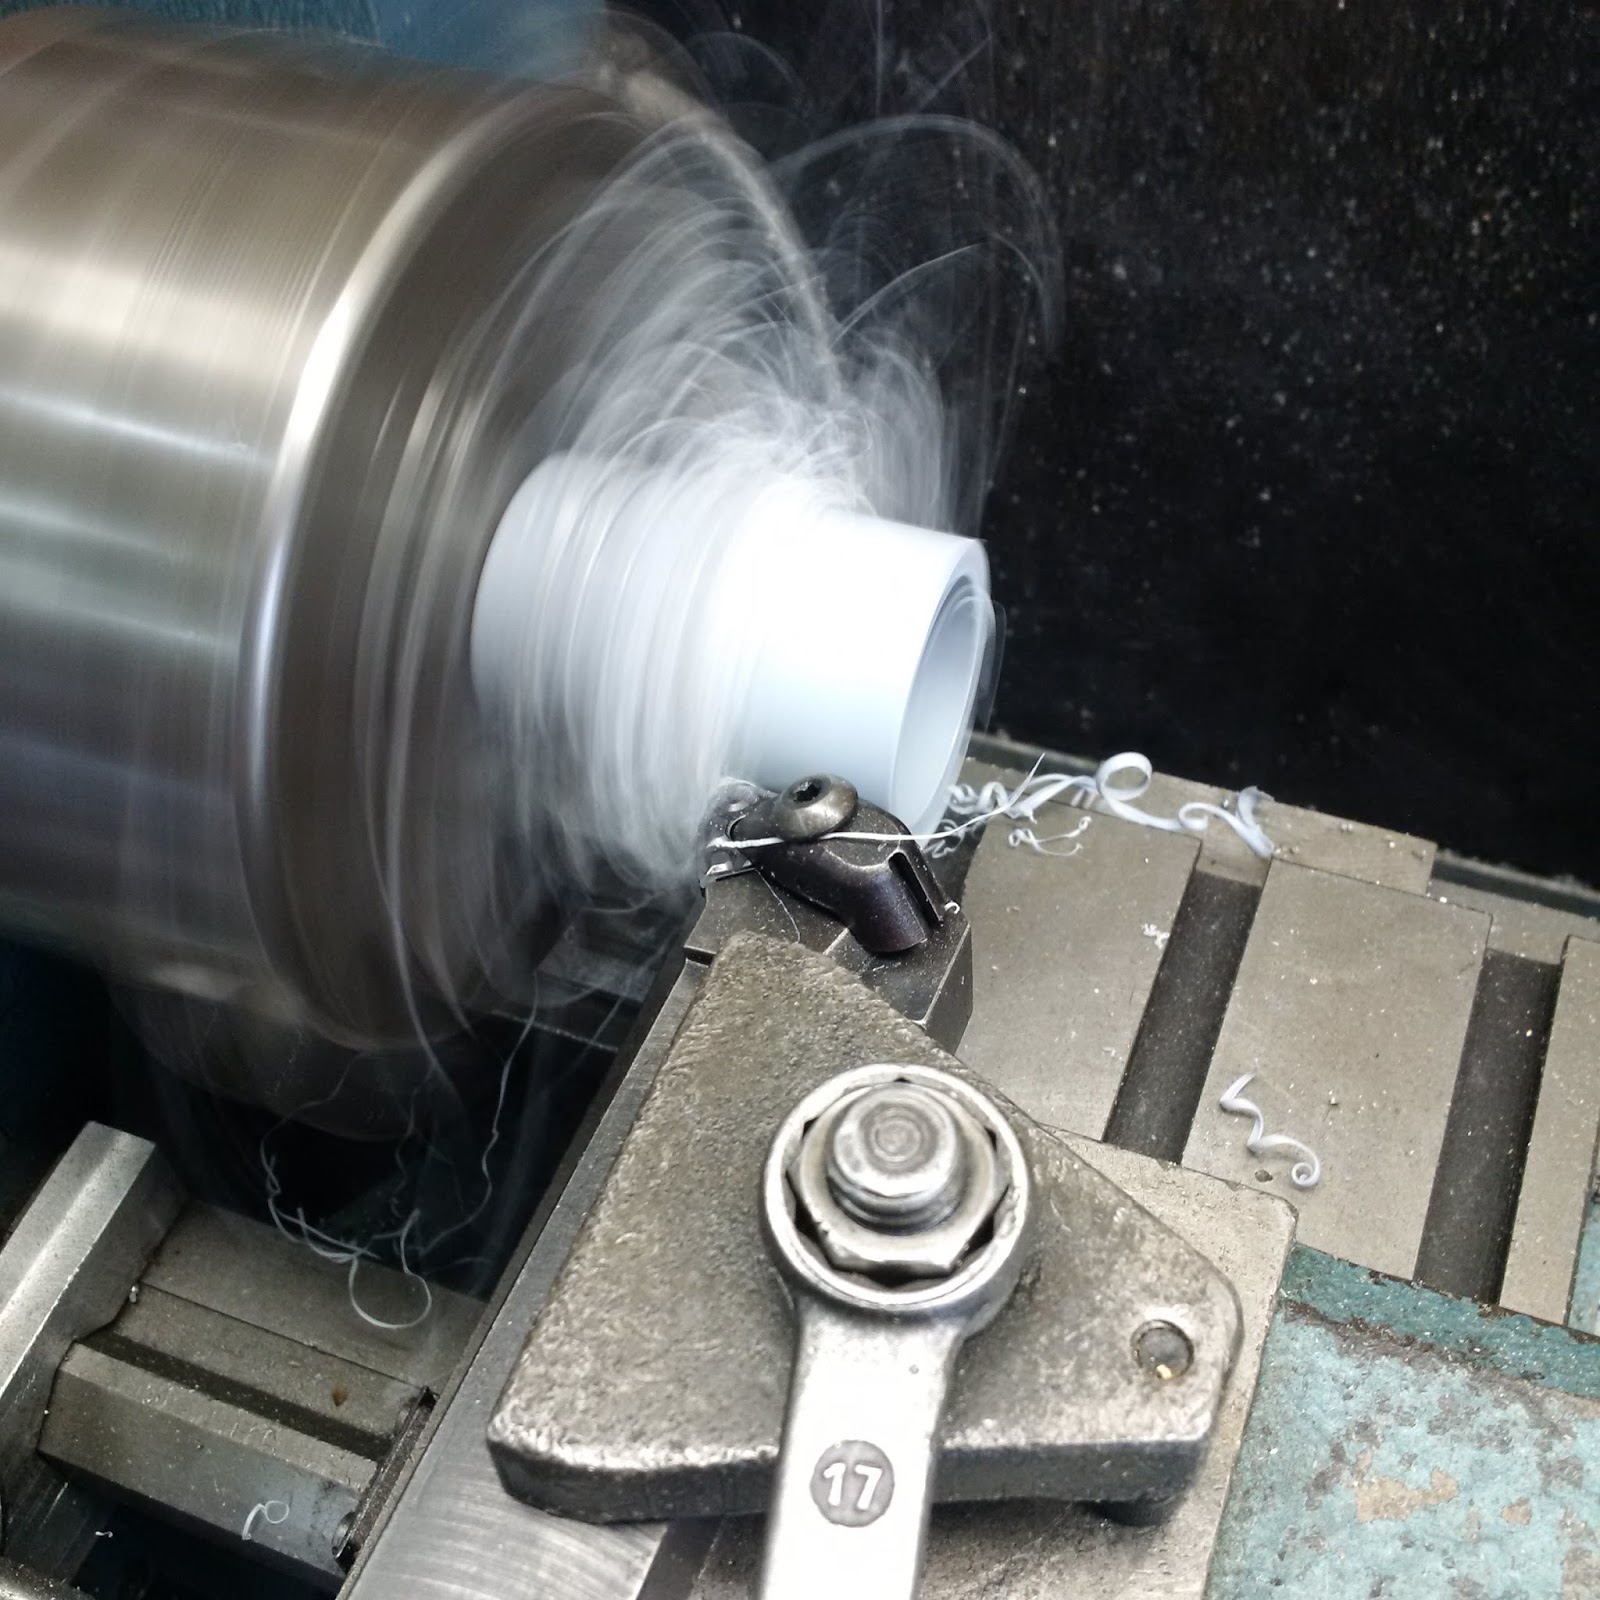
The first thing I ended up doing is removing the glued fitting with the same technique described above, then using a flapper grinding disk I smoothed out the female fitting that was part of the actual solar heater. Next, I glued an ABS coupler fitting on a regular piece of pipe, chucked it up in the lathe and turned it down to the oversized female fitting (1.920" instead of the regular 1.900"). Then, I glued the new (bigger) pipe into the oversized female fitting of the solar heater and continued connecting it to the rest of the piping.
Unfortunately - although it did fix most of the leak - I still had some very slow drops of water coming out so I decided to take my soldering iron and a few strips I cut off of an old ABS pipe and "plastic weld" the fitting. This, again, reduced the leaking a lot, but I was still getting some very small sweat-type leaks.
The last trick I used to plug the holes was to take the leaking fitting, heat it up with a hot air gun, then slather on a bunch of ABS glue. As the fitting cooled down, it sucked the ABS glue into the small holes and permanently plugged up the tiny holes.
Well, that didn't work. AT ALL. I ended up giving up and buying a flexible ABS joint clamp made out of rubber for 8 bucks, screwed it tight and that was the end of it! Stupid holes!
All that was left was to paint the old PVC paint with some special Krylon (actually, it was the Home Depot Brand "2x coverage Rust-Oleum") paint that was specifically designed to go over PVC and other plastics.
After everything was done I measured the temperature and surprisingly, the solar pool heater managed to heat the water by 0.5 degrees Celsius and that wasn't even at high noon. I ran the heater during the day while I was at work and it heated up the pool from around 20 degrees to almost 27 degrees in just a few hours. I think we have ourselves a winner.
Videos:
Pictures:
Finding the location for the solar heater
Trying to figure out where/how to position the pump
Close-up of the pump
First attempt at making the circuit work
Cutting up some lumber for the frame of the solar heater pat
More lumber cut up
The assembled frame
Laying out the fence boards on the frame
The finished solar heater pad
My boy inspecting the work
He approves
The installed pad
Another view
Getting ready to remove the glued PVC nipple
After the solar heater pad/platform was painted
Removing the PVC nipple part 2
Softening the old PVC with some good-ol fire
cleaning up the cut off PVC nipple
Another view
Preliminary installation of the solar heater
The leaking problem joint
Doing the final plumbing
Testing it out with the small pool
Another view
Another view of the solar heater and pad
Closeup of how I managed to hold up the solar panels
View from a distance
Getting ready to glue a connector fitting on a plain piece of pipe
The doubled-up pipe
Another view
Cleaning it up on the lathe
Turning a metal core so I could hold the pipe in the chuck properly
The temporary metal center installed inside the ABS pipe
Live center set, ready to turn down the pipe to 0.020" oversize
Almost there
The finished (oversized) piece ready to glue
The glued fitting
Stupid thing is still leaking (although MUCH slower than before
After plastic welding the joint with a soldering iron - still leaking!!!
After heating up the joint and slathering it with ABS glue - still leaking
After I've given up and slid a flexible coupling over the problem joint - finally leak proof!
Close-up of the problem joint
Tools:
Chop saw
Table saw
Hack saw
Reciprocating saw
Metal lathe & accessories
Measuring tape
Pencil
Nail gun
Compressor
Extension chord
Paint gun
Cordless drill
Soldering gun
Screw driver
Socket set
Knife
Lighter
Channel lock pliers
Materials:
1-1/2" ABS pipe
1-1/2" PVC pipe
ABS & PVC fittings
Pipe clamps
Two 5/4" x 4 - 12' deck boards Two 5/4" x 4 - 10' deck boards
Thirteen 1 x 6 - 6' fence boards
4 x 10 solar pool heater
Nails & screws
ABC/PVC/Transition cement
Cost:
About $150.00 (not including solar heater and piping that came with it)
Time:
15 hrs
Savings:
Not sure, but probably at least $600 to $800 bucks
Conclusion:
It works great and heats up the pool in no-time