First of all, if the previous owner of this horizontal metal band saw ever reads this blog (not the person I bought it from because he never used it, but the person who sold it to him),
SHAME ON YOU!
You have completely and utterly dishonored any tool man's code of "ethics" (if there is such a thing) about how to treat your tools when it comes to this metal band saw.
SHAME ON [expletive removed] YOU!!!
Anyways, now that I got that out of the way, this blog is about fixing the metal band saw I bought off kijiji for $60 bucks
Difficulty Level (Easy, Medium, Hard, Insane):
Hard
Process:
When I started working on my Quick Change Tool Post (Blog to come) I realized that I'd rather not cut through multiple pieces of 2" thick steel with my angle grinder and so I got started looking for a used horizontal metal band saw which I found on kijiji only 20 minutes out of Moncton for $60 bucks.
I went to pick it up one night with my son and got talking to the owner who said that he never used the band saw but that he had gotten it on a trade 3 years earlier. He also told me that the original owner told him that every time he plugged in the band saw that it would blow the breaker. I figured that worst case scenario it would just need a new motor (which I had plenty of lying around). I agreed to the purchase and hauled it home.
At home, the first thing I did was testing it and yes, the breaker blew as soon as I flipped the switch. After unplugging the band saw I opened up the electrical box that joins all the wires. Reading through the wire configuration that was printed right on the motor, I realized that the electrical wires were twisted together in a wrong order. I re-twisted the wires in the correct order and wouldn't you know it, the motor turned on just like perfect.
FOR EXACTLY 4 SECONDS!
Then I heard this dreadful "SNAP" and I knew that there was something seriously wrong. After I opened the gear box I saw it right away: 3 bloody teeth snapped right off the worm gear. Upon further inspection the original owners ABUSE started coming to light. First of all, the worm was broken in half to which they decided to just WELD it to the shaft. Then, the worm gear came lose, so they drilled a hole through the worm gear, tapped some thread and put a machine screw into it to hold the worm gear in place.
They didn't use thread locker or anything, because that would have been just too easy for those idiots. Or course, that machine screw came lose, jammed into the worm, prevented the worm gear from turning and resulted in the snapped gear teeth.
WOW, what a stupid, STUPID thing! Yes, I am greatly annoyed at the original owners INCOMPETENCE and utter lack of respect for this tool. Yes, I am so angry, I could take the band saw and throw it right at them (well, that was before I fixed it up)!
Anyways, after I had calmed down from this disaster, I realized that I'd have some serious decisions to make. After some research I found out that replacing the worm and the worm gear would cost me about $200 bucks, adding the $60 I paid for that thing would almost get me a brand new (identical) one at Harbor Freight. Of course, that would be too easy and so started the long journey of creating the following:
1. Fly Cutter
2. Dividing Head
3. 39 Tooth Gear
4. Internal Thread Cutter
5. Ejector Nut for Mill
6. 94 Tooth Gear, Worm and Worm Gear
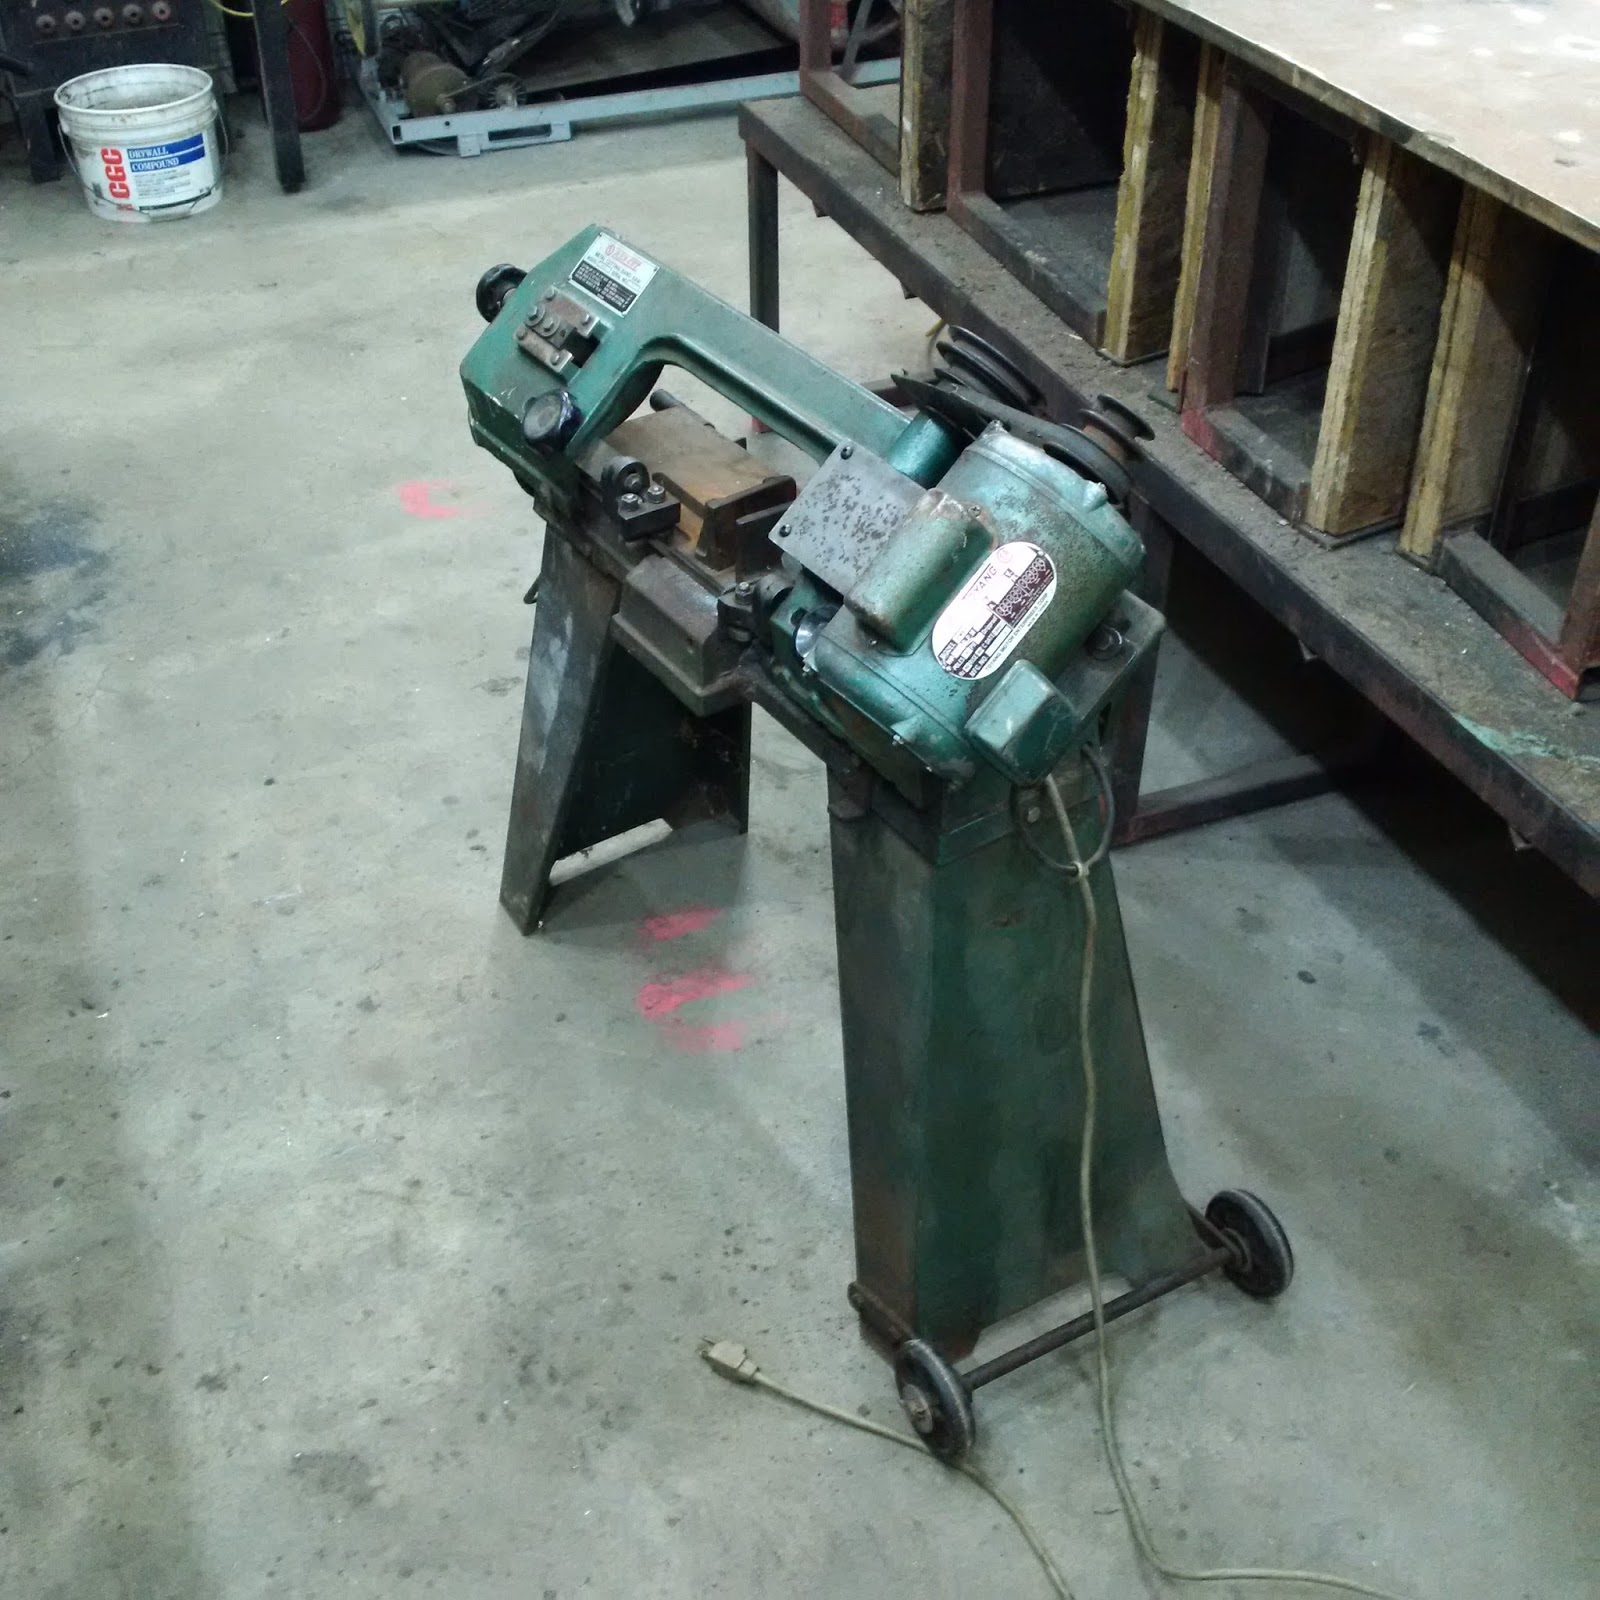
After a few months in the shop I was finally at the place where I had fixed the original SCREW UP and was able to start restoring my metal band saw.
The process for that was actually quite easy. It consisted of taking the whole band saw apart, cleaning and sand blasting all the parts with my Collapsible Sand Blasting Cabinet, welding a cross brace to the support legs and then painting it and putting it all back together.
Videos:
Pictures:


Tools:
Screw drivers
Socket set
Adjustable wrenches
Pliers
Metal lathe & accessories
Square
Measuring tape
Dividing head
Mig welder
Angle grinder
Parts washer
Hammer
Vise
3-prong bearing puller
Materials:
6" of 1/2" cold rolled steel
Six 6000RS2 bearings
4" of 2.5" brass
12" of 1.25" 4140 round steel
Two bearings (for motor, forgot size)
Four 6202RS2 bearings (for gear shafts)
400ml gear oil
2 cans of black matte metal spray paint
Various bolts
Brass bronze rod
12" of 1" x 1" x 1/8" angle iron
22" x 1/2" v-belt
Painters tape
Cost:
$60.00 (plus the $60 for the saw)
Time:
10 hrs
Savings:
$180.00
Conclusion:
Maybe the cost saving wasn't worth it, but the education was priceless!

6 comments:
Great job on the band-saw! Might I recommend now that you have it bat-man black a bit of crimson red pin-striping? A fellow near me airbrushes and pin-stripes all his tooling after painting... and I must say this saw is dressed in the tux- but has no tie... Great project and Im saving your blog. Im on the Gingery Yahoo group- thanks for posting!
@s_dunca, i love the analogy about the tux with not tie. you're absolutely right and i do think i'm gonna paint myself some color on that beast.
Great job on restoring your bandsaw! This is a great machine and capable of very accurate cuts if set up properly. I have made 10's of thousands of cuts on mine and still strong. There are many iterations of this machine on the market and some of them are inferior copies. You have one of the good ones. I also suffered a broken guide roller cage after hastily replacing the bearings. Arc welded it together using ss rods and still strong as ever 10 years later.
I have bookmarked your blog, thanks for your all the detail.
Another Chris from South Africa
What a labor of love. Funny I just picked up the same saw from Kijiji today--rusty yes, but the old girl runs like a charm!
my blade keeps coming off any suggestions?
I would try to tighten the spring which is attached to the saw head to make the weight if the saw head a bit lighter. I find that if too much weight is put on the blade mine comes off too.
Post a Comment