Once all of these had been built, the first step was to create a change gear with 94 teeth to allow me to cut a thread with a .2618" lead. The math I used was as follows:
45 teeth (with the 8 TPI setting) = 0.125" lead
x teeth = 0.2618" lead
solving for x I get (45 * 0.2618)/0.125 = 94.248 teeth
If I round down to 94 teeth, the actual lead it would produce is as follows:
45 teeth (with the 8tpi setting) = 0.125" lead
94 teeth = x
solving for x I get (94*0.125)/45 = 0.2611"
Since a 94 tooth gear would produce a lead only 0.0007" off per thread and the worm has about 5 threads I would only be off by 3.5 thousands of an inch which in my scenario actually didn't matter at all because the hob which creates the actual worm gear used the same lead.
The most accurate gear would have been a 106 tooth gear with a 9 TPI setting to produce a 0.2617" lead but because this was only a one-time deal I decided to stay with a gear as small as possible so as to not put too much stress on the lathe.
Now that I had all the math out of the way it was a fairly straight forward (but time consuming) process of
1. Cut the gear blank for the 94 tooth gear
2. Cut the actual gear
3. Mount the gear in the lathe
4. Cut a piece of 4140 steel to length, turn it and then cut the thread (worm)
5. Cut one half off and harden it
6. Take the other half and mill cutter slots out of it to make the hob
7. Harden the hob
8. Cut the brass gear blank
9. Use the dividing head to gash 20 slots in the gear blank
10. Use the hob to actually hob the gear
A few snags I ran into was that I did not use a metal core at the center of the 94 tooth delrin gear which caused it to actually slip and tear the crap out of the rolling pins I used to tie the two drive gears together. This in turn caused the ACME insert to bind up on the blank piece of metal which bent the snot out of it.
I ended up messing up TWICE until I decided I'd have to bore out the center of my 94 tooth gear and press fit a metal core into it. The third time I decided to take it very slow and instead of using a straight ACME insert I'd use a parting insert, cut a SQUARE profile into my worm and then use the ACME bit at the very end to cut the 29 degree angle which was required for my worm.
The tool holder I used was a Maxx-Edge ME2210210 NSR 12-3B and the insert I used was a NA3R4 KC850
That seemed to work out quite well. It still took me quite a while because it was (and is) still a learning experience for me. But once it was done I was quite proud and very pleased with the results.
After the worm gear was done, I had to cut a key way and drill/tap a set screw and I was ready to go install it in the metal band saw (blog to come).
Update:
Unfortunately, after a few hours of using the new worm and worm gear, the rough texture of the hardened worm wore right through the teeth of the worm gear leaving me with a stripped worm gear and some gear oil in the gear box that looked like it was a glitter paint art project.
I had suspected that this might happen and ended up having to take it all apart, put my worm and hob back on the lathe, and use my DIY Tool Post Grinder to grind them smooth.
After the worm and the hob were ground smooth, I re-cut a new brass worm gear and put it all back together. I checked it after about 30 minutes of running and although there is some brass dust in the oil, I think it's mostly from smoothing out the rough gear teeth. It certainly seems to be working a lot smoother. And, just in case I have to make another one in the future, I took really good measurements and drew it all up in AutoCAD. Hopefully, I won't have to ever make another worm gear for that metal band saw.
Videos:
Pictures:
The hodge-podge screwed-up fix of the previous owner
The broken worm
The broken worm gear
Another view of the 3 worm gear teeth that were sheared off
A paper sample of the required change gear
Raw stock of Delrin
Some calculations for cutting the 94 teeth
Cutting the gear blank out of delrin
The finished gear blank
Getting the dividing head set up
Using the 47 hole ring
Mounting the sector arms at 20 holes in the 47-hole ring
The crank handle installed on the dividing head
Using a diamond sharpening saw to create the profile for the fly-cutter
Close-up of the fly cutter tool
The shaped cutter installed in the fly cutter
Adjusting the height of the fly cutter to center height
Getting started on cutting the 94 tooth gear
Close up of the 94 tooth gear about half-way done
Cutting the last tooth
The finished gear before it was cleaned up
The finished gear
Cleaned and stamped with 94
The gear mounted in the lathe
The spec sheet for the worm and worm gear
Cutting off 6" of 4140 steel
Getting ready to turn the steel down to size
Turning the 4140 steel to size
Another view
This was the tool holder I used: Maxx-Edge ME2210201 NSR 12-3B
This was the insert I used: NA3R4 KC850
After the first scratch pass
Matching the old broken worm with the new steel blank
Almost done
The mangled delrin gear
After the center was bored out and a steel core was pressed in
The two gears that are linked together with two 1/8" steel roll pins
The two gears mounted together
The gear mounted in the lathe
Third attempt at cutting the worm
Close up after the square portion was cut out
The finished worm meshing nicely with the worm gear
Closer up after it was all cleaned up
Parting off the actual worm from the worm hob
The finished worm before heat treating
Another view
The heat treated worm
Another view
The new worm mounted on the metal band saw shaft
Milling the cutting slots into the worm gear hob
Another view
The finished worm gear hob
Turning a piece of 2.5" brass to size to make the worm bear blank
Closer up of the almost finished brass worm gear blank
The finished worm gear blank
Parting off some spacers for the mounting post that will hold the bear blank
Adjusting the gear blank to center height
Another view
Getting ready to hob the worm gear
A few minutes into hobbing the gear
Another view
The completely mangled up gear blank
Adjusting the angle of the dividing head to match with the angle of the worm gear
Another view
Making sure the dividing head is set at the right angle
Gashing the gear blank for 20 teeth
Close up of the beginning of the gashing process
Another view
The gashed gear blank
Another view
Getting ready to start the second attempt of hobbing the gear blank
Another view
The finished worm, worm gear, gear hob and the old worm and the old worm gear
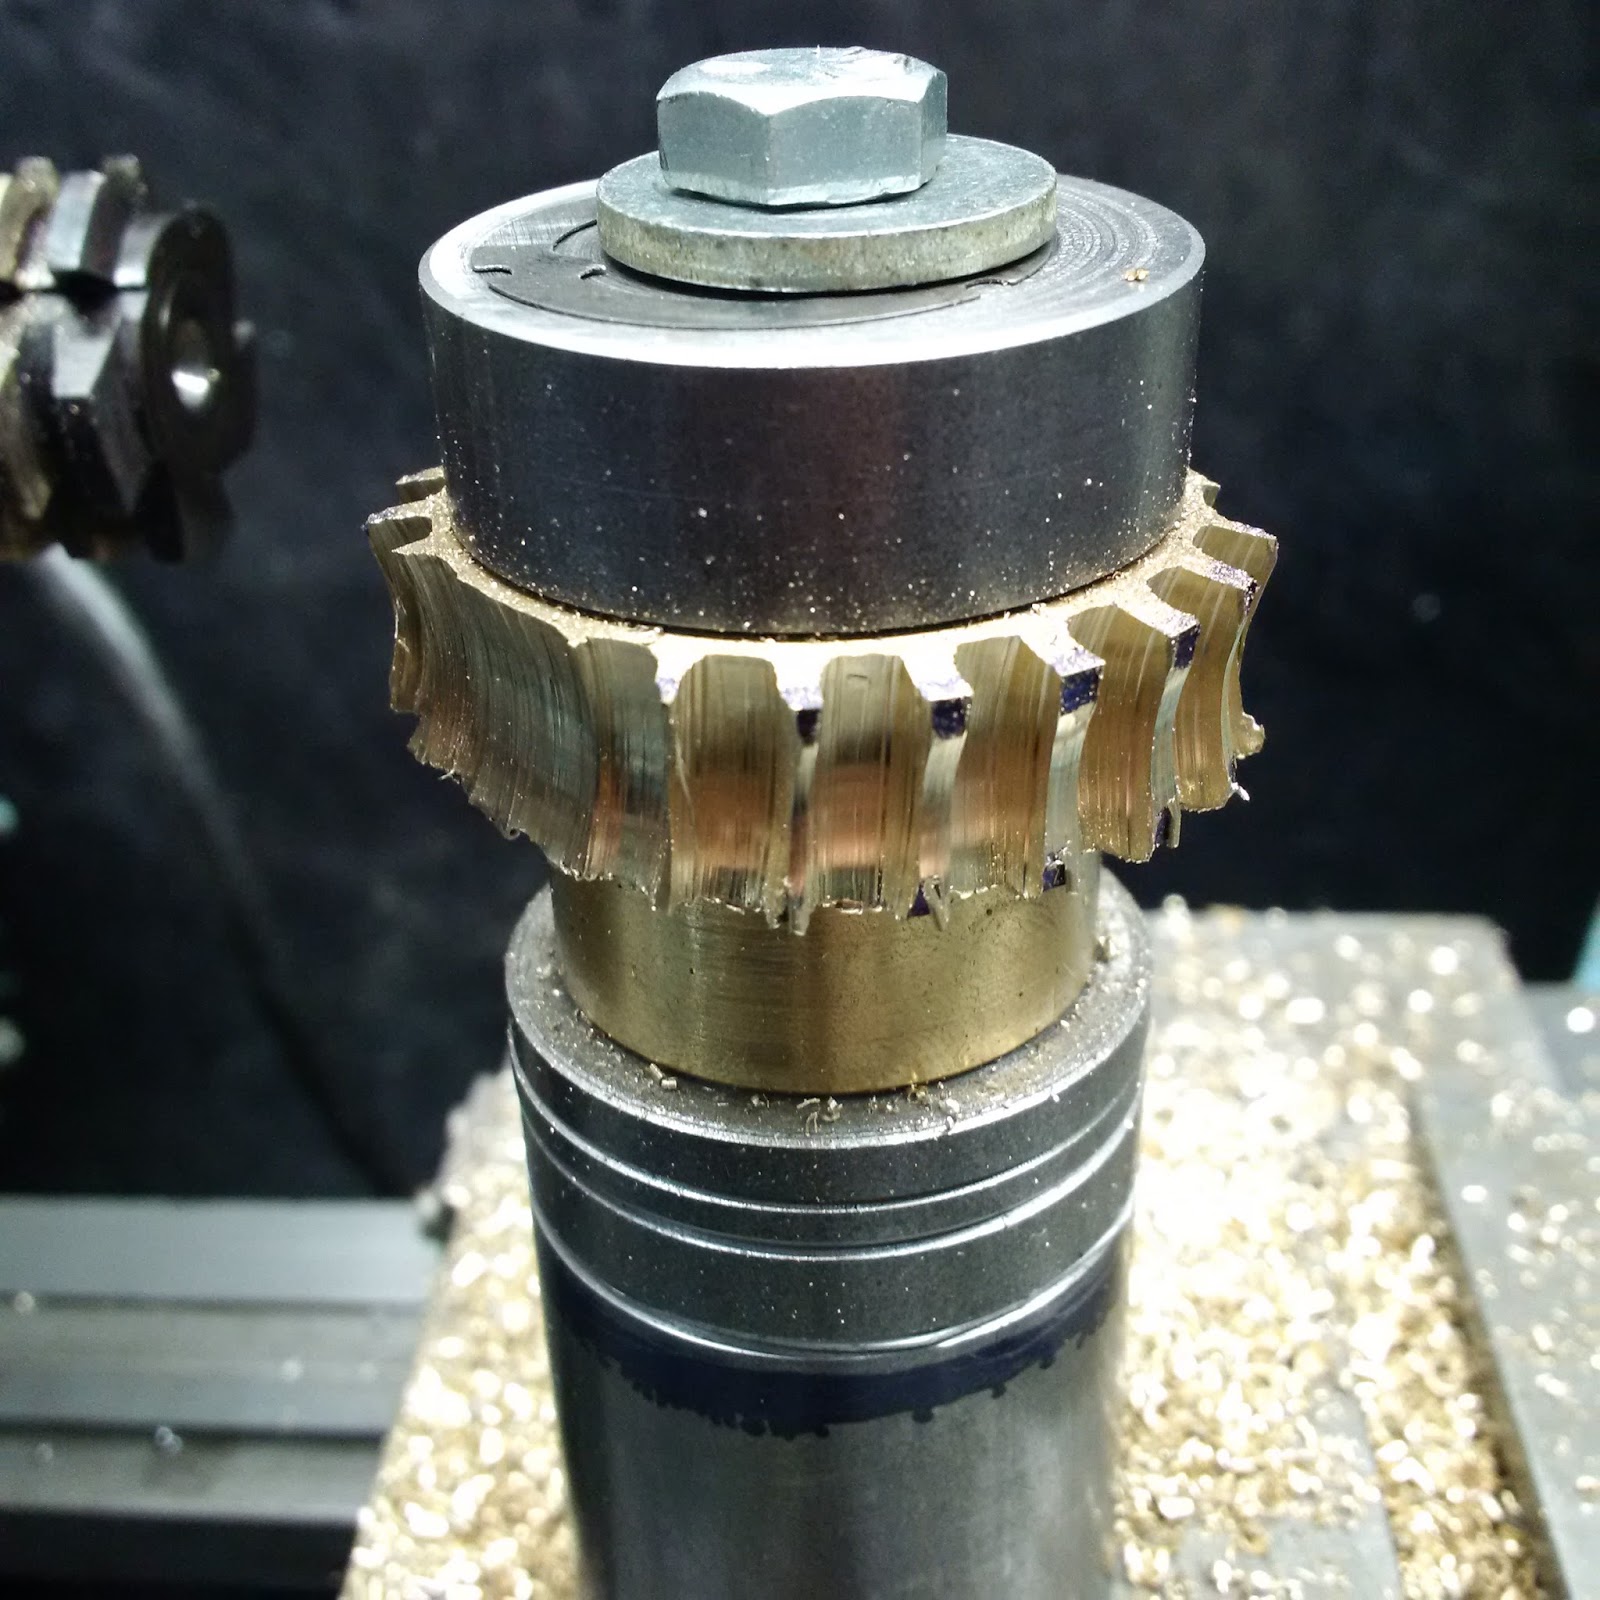
Close up of the finished worm gear
Another view
Another view
Another view
Cutting the 3/16" keyway
The assembled worm gear
The dimensions of the final worm gear
Tools:
Metal lathe & accessories
Angle grinder
Measuring tape
Markers
Bench top grinder
Drill press
Cordless drill
Hammer Propane torch
Bucket of water
Ear/Eye protection
Diamond grinder
Materials:
6" of 4140 (I actually used 18" because I wrecked the first two 6" pieces)
Roll pins
2" of 2.5" brass
Cost:
$25.00
Time:
20-30 hrs but much of it was learning and re-doing my screw-ups
Savings:
$200.00
Conclusion:
I am very pleased with how it turned out.