This goes with the main blog about my foundry furnace (http://chris-eigenheer.blogspot.com/2012/02/home-foundry.html). I had to build a propane burner from scratch to make it work with the furnace and for it to put out enough BTUs.
Process:
After taking my 4 year old boy out to McDonalds for some breakfast, I decided I was gonna take him out in the shop and teach him some metal working skills and how to play with fire. Ok, I was just told by my wife that I wasn't supposed to have him out there when I blow up stuff, I mean build propane burners!
The propane burner I bought at Harbor Freight was a piece of crap and suitable just about only to burn weeds so I needed something a little more sophisticated. After some research I found out that a venturi effect would be perfected with a 30 degree intake nozzle angle and a 5 degree exit nozzle angle, but since I don't have a metal lathe (yet!) I ended up taking a 12" piece of 1" black water pipe that I got for free at a local sprinkler business, screwed on a 1-1/2" to 1" reducer at one end and a 2" to 1" reducer at the intake (those cost me $10 bucks cash at the same sprinkler place).
For the propane intake, I found some 3/16" brake line pipe from one of my previous car fixing adventure, a male bubble-flare adapter and a female to female adapter to hook it up to the propane torch from Harbor Freight (without the propane torch burner).
I had to make a bubble-flare on the brake line first, then turn it into a double flare and connect the brake line to the f-to-f fitting with the male adapter. Then I drilled a hole through the 1" black pipe, drilled a 1/16" hole into the brake line and stuck the brake line through the 1" water pipe at a right angle.
Once it was stuck through, I flattened the open end and soldered it shut with some regular solder. Works like a charm
Connecting the brake line to the propane torch needed a bit of grinding and re-tapping the threads to make them fit the f-to-f adapter but after some time that worked. The video below was taken before I welded the set screws to stabilize the brake line.
Once I connected the propane tank I realized that the brake line turned inside the water pipe and created a less than ideal burn ratio so I had to weld a nipple to the 1" pipe, weld 3 nuts to the nipple and use 3 screws to fasten the brake line solid. After welding a mounting bracket to the furnace and grinding off the hot end of the burner (it was just about 1/8" too large) I was able to stick it through the side of the furnace, fasten it in place with the set screw and light 'er up.
Then, at 8:30PM I decided to give the whole melting metal a whirl. Fired it up and within 10 minutes the crucible was red hot. I threw some pieces of a smashed up tranny case in there and within notime i had 10 lbs of molten aluminum. I made a quick sand mold out of some yoghurt cans, scooped off the dross at the top of the aluminum and poured it into the mod. Le voila! It works. Now I can build me a wood model of some ingots and start melting/refining the aluminum. Good times!
Pictures:
The burner in action
The first aluminum melt
 |
| Original burner used to dry out refractory cement wasn't powerful enough |
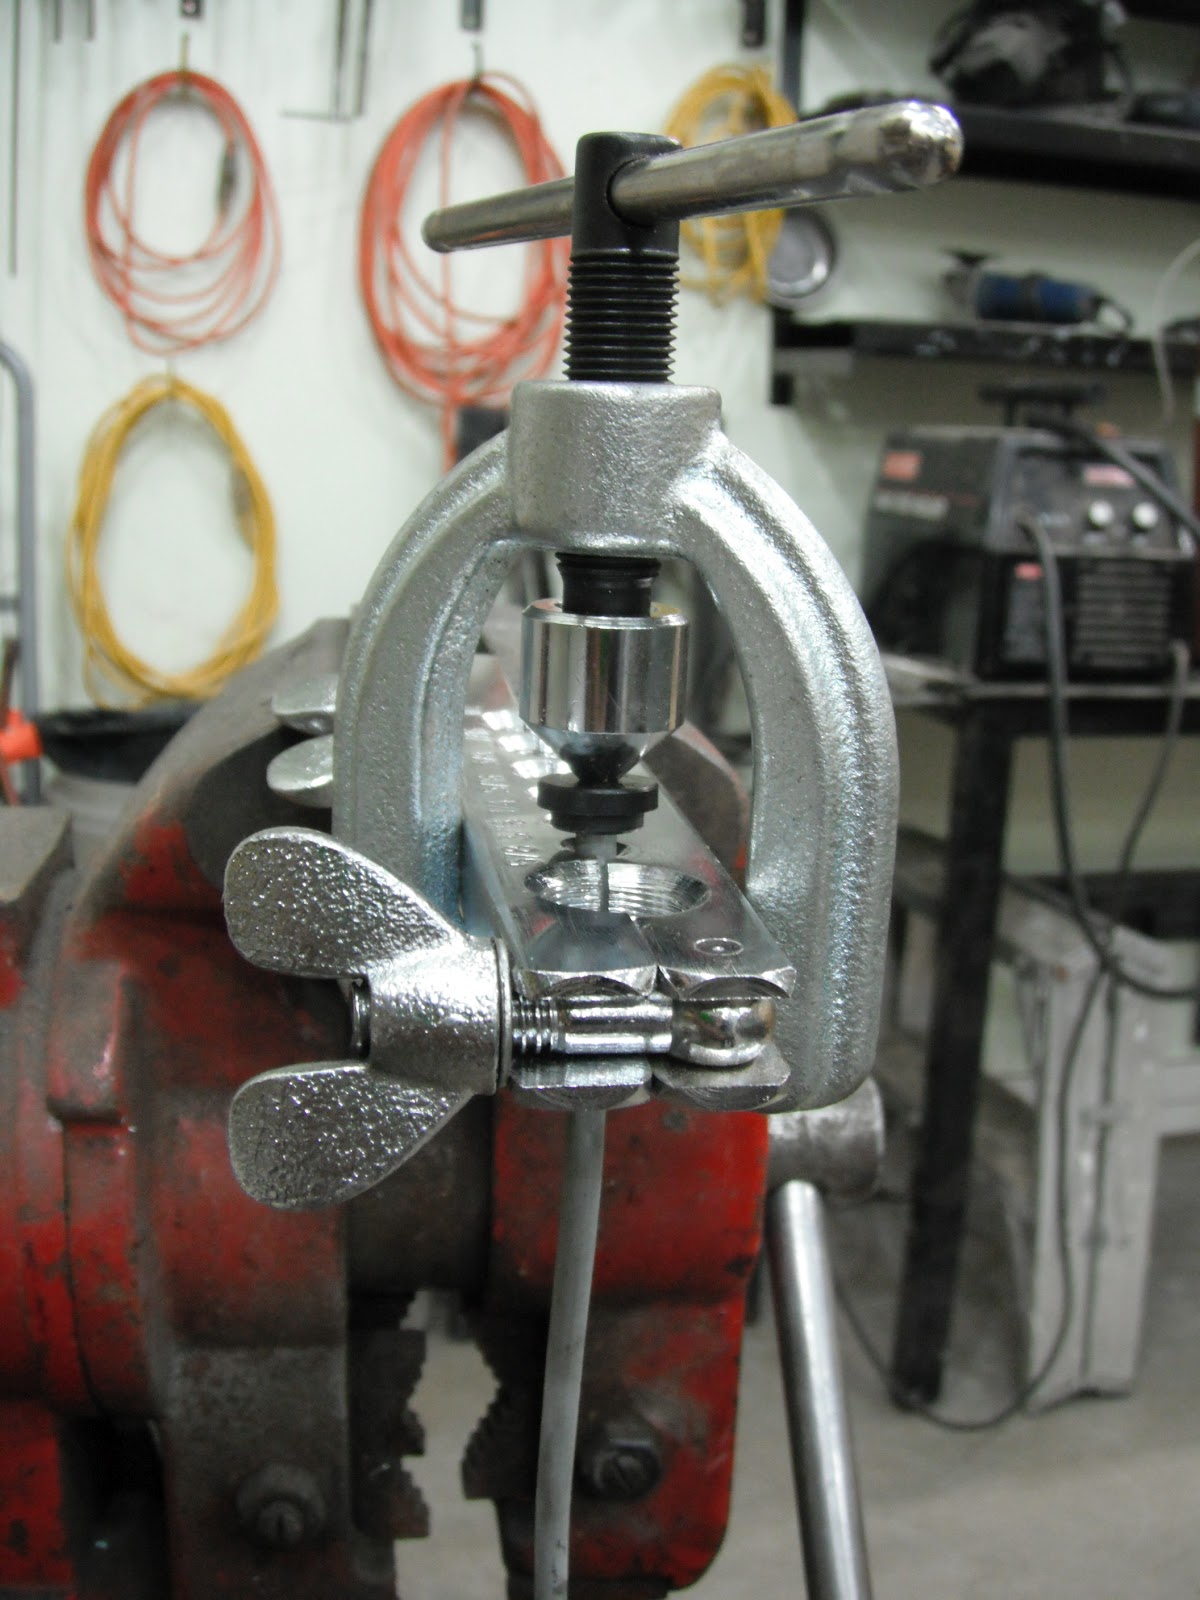 |
| The double flaring tool used to first create a bubble flare on the 3/16" brake line |
 |
| Then the same tool was used to create a double flare |
 |
| Here's the finished brake line with the double flare, the male adapter and the f-to-f adapter |
 |
| The double flaring tool. $20 bucks at Princess Auto |
 |
| The burner in action. Note the shadows that the heat waves cast on the door...spectacular |
 |
| View from the rear to the front while the burner was burning |
 |
| The nipple with the 3 set screws to hold the position of the brake line in the perfect place |
 |
| The real burner in the furnace |
 |
| Close-up of the bracket I welded to the furnace to hold the burner in place and to make for easy removal of the burner |
 |
| The red-hot glowing crucible with the molten aluminum |
 |
| The yellow at the top is the front nozzle of the propane burner a "little" warm |
 |
| The top of the sand mold once the aluminum solidified |
 |
| The bottom of the sand mold where the molten aluminum contacted the second mold frame |
 |
| It looks like there was a metal bold on one of the aluminum pieces I melted up. It just sank to the bottom and I could scoop it up once it all cooled down |
 |
| From top, counter-clockwise: 10lb ingots, dross, left-over stuff from the bottom of the crucible |
Angle grinder, bench grinder, drill press, mig welder, double flaring tool, pipe thread cutter
Materials:
12" of 1" diameter schedule 40 black water pipe, one 1-1/2" to 1" reducer, one 2" to 1" reducer, 6" of 3/16" brake line, one male double flare adapter, one female-to-female double flare adapter, propane torch, set screws, 4" of 1"x1/4" flat iron, some gas-rated teflon tape, 2" of 3/4" water pipe, some nuts for the set screws
Cost:
$10 for the reducers, $10 for the propane torch, the rest was left-over pieces of stuff I had in the shop.
Time:
About 7 hours including hunting for parts at Princess Auto and Tri-Province
Conclusion:
She's roaring alright! Gonna make me some molten aluminum now!

5 comments:
you are a goof. what will I get from all this??? that's the burning (haha get it)question
and no. n cannot be out there when you light things on fire :)
love ya!
Chris, you have way too much time on your hands. (And a super wife who will let you spend it in the shop - at least that way the mess is not in her house:)
Anyway, I always get a kick out of reading about your projects - in SO much detail!!!
So what's next? a rubber factory to remake the original tires for the Cucciolo??
I love you my big bro! You make me smile.
And I wonder what your son will be up to in ?? years? Love you and I think I know were you have that genius gen from... and it is possible that it moves to the next generation!
Good look and Gods protection in your shop! Love Muetti
u-the perfect trade off, he goes to the shop i go out with friends! and please don't encourage him! rubber tires???? NOOOOOOOOOOO ;)
m-i hope nate will grow up to be like his dad, that would make me smile!
Would you.build one for me
Post a Comment