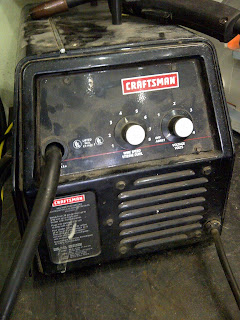
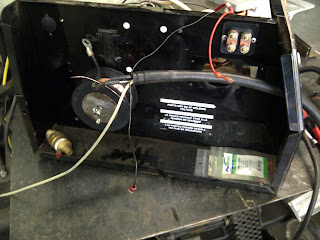
Fixing the wire feed mechanism for my cheap-o Craftsman MIG Welder (Model: 117-076-902)
Difficulty Level (Easy, Medium, Hard, Insane):
Medium
Process:
About 9 months ago I started noticing that my MIG welder wasn't working very well anymore. At first I thought it was something wrong with the mechanism that creates the welding current, but after some investigation I found out that it was actually the motor that feeds the welding wire. After taking it apart, cleaning and re-greasing all the gears and putting some oil in the bearings of the wire feed motor I thought I had fixed it. Unfortunately - and although it did work better for a while - that was not the case.
After some more investigation, I found that the actual issue was not the motor, but the board that controls current TO the motor.
After doing some searching online for a replacement part I was shocked to learn that it was going to be over $100 bucks including the shipping and exchange.
Naturally I went looking for an alternative solution. I discovered that the motor itself uses direct current, up to 30V, depending on how fast I wanted to feed the welding wire. So I thought that I could just use one of my voltage regulators I had bought off ebay a while back.
After the little buck step down converter was installed, I fired up the welder and it worked great! For about 10 seconds and then one of the capacitors on the buck converter blew up.
Back to the drawing board.
In the meantime I used my bench top power supply and hooked it up to the wire feed motor which meant that every time I wanted to weld something I'd have to haul out the power supply, hook it up to the welder and then I was able to do my welding.
Naturally, that wasn't going to be a permanent solution. I measured the voltage input for the old regulator and found that never exceeded 40V so I ordered a more high-rated buck step-down converter from ebay. After a LONG 8 weeks I finally got it, installed it, and wouldn't you know it, after 15 seconds that one blew up too!
So, after some more pondering I remembered that I had taken apart an 18V power transformer from my son's 18V electric bike and thought that if I could hook up that power transformer inside the welder and use the 18V as an input for the step-down converter it should no longer blow up.
I ordered a THIRD AC-DC DC-DC 3A Step Down Regulator I/P 6-36VAC 6-50VDC O/P 3-36VDC from ebay and got it after ANOTHER 8 weeks of waiting. Last night, I finally took some time to install it and surprisingly, it only took a little over an hour to do so now I have a fully functional MIG welder again.
Pictures:
 |
| The front of my welder |
 |
| The side of the welder |
 |
| Model and S/N info |
 |
| The left side of the welder where the wire feed mechanism is |
 |
| The wire feed motor and mechanism |
 |
| The gears for the wire feed mechanism |
 |
| Another view |
 |
| The right side of the welder with the coils |
 |
| Getting ready to install the power transformer and the buck step down converter |
 |
| Power transformer (right) and step down converter (left) |
 |
| Close-up of the power transformer |
 |
| Close-up of the buck converter |
 |
| The finished beauty |
Drill
Screwdriver
Pliers
Materials:
Wire
Marretts
Buck step-down converter
18V power tranformer
Cost:
$10.00
Time:
2 hrs
Savings:
$90.00
Conclusion:
Success. I hope it will last.

0 comments:
Post a Comment