Friday, October 24, 2014

Trench Drain

Project:
Building a trench drain in front of my friend/co-worker's garage

Difficulty Level (Easy, Medium, Hard, Insane):
Easy

Process:
After spending about 15 hours on research and calculations and preparing to actually do the job I went to a scrap yard and scored some galvanized metal grate. They were quite heavy, about 200lbs, 3feet wide and 9 feet long. I cut them into twelve 8" wide by 3' long pieces.

Next thing was building the forms for the actual trench. Normally you buy pre-fabricated channels but since they quoted me $2500 just for the trenches I had to look for some alternative ways to get it done. I ended up building a gradually increasing T-shaped chanel out of 1/2" OSB. I made four 8' pieces and one 4' piece.

On the actual job site, I had to cut the asphalt with a diamond blade. Originally I was going to rent one of those walk-behind saws that you can hook up to a garden hose but since the asphalt was only about 2.5" thick I was able to save 2hrs of driving back and forth to pick up and return the rental machine and use my own angle grinder with my 7" diamond blade. It worked like a charm although I must say that my arms were quite vibrated after the 45 minutes it took me to make the cut.

Next, I used a sledge hammer to demolish the asphalt and then a heavy pick axe to loosen it. After picking up the pieces and wheeling them away in my wheel barrow it was time to use the pick axe again to loosen the gravel underneath.

I measured the correct slope of the trench drain and snapped a chalk line against the side of the existing garage slab to make placing the concrete a bit easier.

Once the gravel was shoveled out and leveled, the ends were capped off and prepared, the pre-fabricated forms were placed in the trench to test I was ready to order the concrete.

Once the concrete showed up I just had to wheel it in with the wheel barrow, level it out with a square shovel, place the pre-fabricated OSB forms and fill in the sides.

Once that was all done, I used a trowel to finish it all up nice and neat. After cleaning the asphalt with a pressure washer my son and I (who helped me out all day) were ready to go home.

After 3 days of letting the concrete cure, Nathaniel and I went back to take out the forms, put in the metal grate, dig the 4" drain tile into the yard as a run-off and clean up. After all was said and done I have to say that it looked pretty darn amazing! I was very proud of my boy and with how the entire job turned out.


Videos:


Pictures:
Some of my calculations
Some of my scouting pictures
My daughter helping me out
Another view of where it will go
The galvanized metal grate I found at the scrap yard
Eliana making sure it's acceptable quality
After the pieces have been cut up and deburred
A close-up of one of the trench forms. The very bottom piece was cut at an angle so it could be removed easily after the concrete was cured
Making sure they fit together properly
All done and waiting for placement
About 15 minutes after we started
The asphalt I cracked with the sledge hammer
Nathaniel helping me out
It was coming out quite nicely
Proud helper after we were ready for the concrete pouring
Close-up of the change-over to the drain tile
After the forms were placed to make sure they fit
Cool shot of the chalk line from within the trench
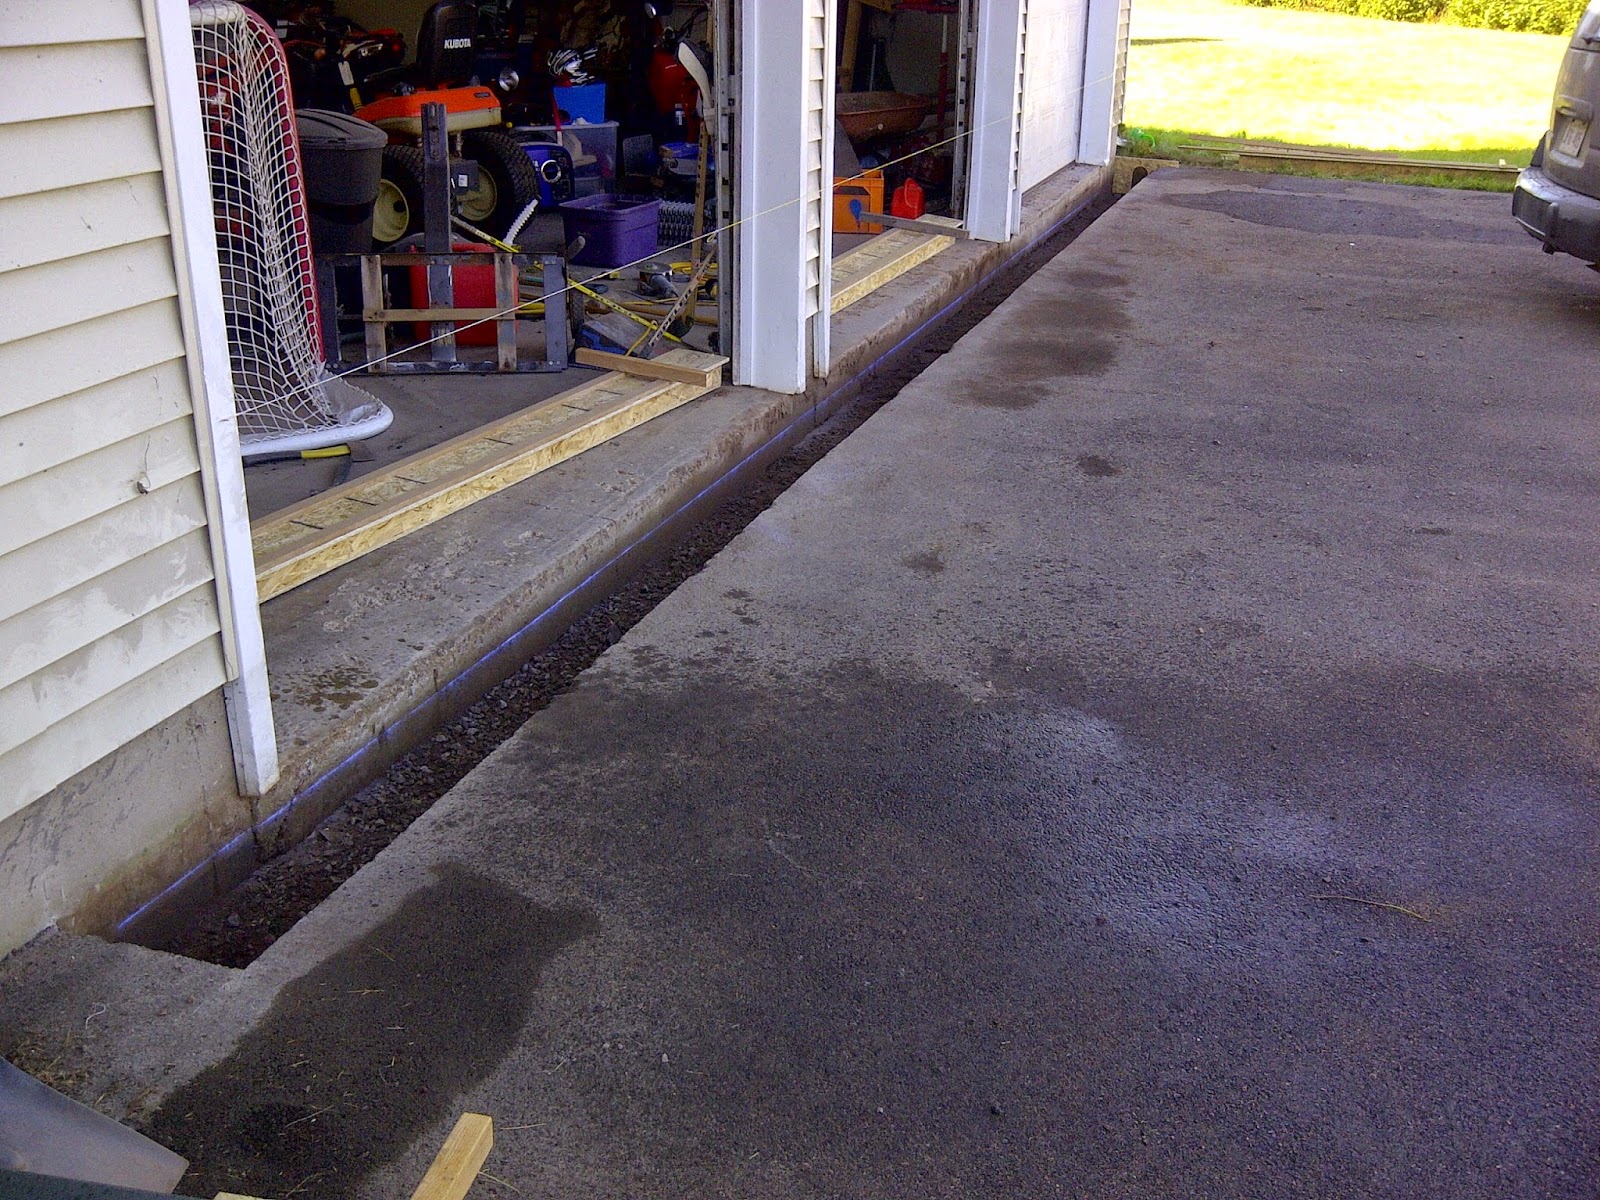
Another view of the prepared trench, ready for the concrete
Having some lunch while waiting for the concrete truck to show up
After the concrete was placed and finish trowled
Close-up of the drain exit. The green "T" was to tie the gutter down spout into the drain tile
Starting to dig the trench to place the drain tile
Nathaniel helping me to remove the forms
Half-way done removing the forms
Testing the slope with some water
After placing the galvanized iron grate
After the drain tile was dug into the ground and covered up again
Nate posing with the finished project
Close-up of the drain
Another close-up
The finished trench drain
Another view
And another one
Last view
Tools:
Angle grinder
Metal cutting blade
Diamond blade
Table saw
Chop saw
Air stapler
Eye protection
Ear protection
Gloves
Square
Markers
Measuring tape
Sledge hammer
Pick axe
Chalk line
Hammer
Level
Jig saw
Drill
Regular shovel
Square shovel
Wheel barrow
Finish trowel
Crow bar
Broom

Materials:
Glue
Nails
Screws
3 sheets of 1/2" OSB
10 strips of 5/8" MDF
Five 16" long 2x2s to hold up OSB forms
String

Time:
Somewhere between 32 and 38 hours

Conclusion:
It looks really nice. We'll find out next spring if it really works as planned

Friday, September 5, 2014

Concrete Borders for Trees

Project:
Creating concrete borders around the trees in our back yard

Difficulty Level (Easy, Medium, Hard, Insane):
Easy

Process:
Since we've had the opportunity to buy a second lot behind our house in 2009 we have steadily been planting a couple of trees each year bringing us up to almost 20 as of now. A few years back I put some black mulch around the trees but it never really looked right. I've always wanted to put a little extra professional touch on our landscaping and have been doing some research as to how to best do that.

I've concluded that the best cost/benefit solution would be to pour my own concrete borders around the trees and fill the inside with mulch. This would serve (at least) three purposes:

1. Create a neat edge around the tree
2. Simplify mowing the lawn around the mulch
3. Upgrade our landscaping

A few days ago I decided to finally start on this project. The first thing I did was take a metal rod that I reclaimed from an old patio umbrella (I think), bent one end to go around the small tree trunks and taped some marking spray at the other end. I made one of those contraptions 24" long (creating a 48" diameter) and one at 30" (creating a 5 foot circle).

After I mowed the lawn and sprayed the circles on the freshly cut lawn, I used my circular saw with a custom blade to cut through the top 2-3 inches of sod along the spray painted lines. Next, I used a pick axe to cut off a 6 inch strip of sod to a depth of about 2-3 inches.

Lastly, I cut a 2 inch strip of 1/8" particle board and formed a circle to give me the proper height and make it a bit rounder than if I just did it by eye.

After I poured the first batch though I realized that the 1/8" particle board pretty much disintegrated after being exposed to the wet concrete. The ring itself turned out ok but since there was no way to re-use the strips and the set-up was fairly time consuming I had to come up with a better solution.

I ended up buying 40' of 1.5" x 1/8" flat iron and had a shop put a bend in it for $5 cash. Then I welded some pieces of angle iron to the metal so I could hook them into pieces of wood to hold up the metal ring.

After some fiddling around and cutting up some spacers to keep the border nice and consistent I mixed up the concrete, poured and troweled it. Then, after about an hour or two I used one of the rubber stamping mats I had created when I did my concrete driveway back in 2009 to stamp some texture into the concrete.

The next day I removed the border and cleaned up the edges a little bit. A day after that, I cut the expansion joints with a diamond blade and my angle grinder, sealed the concrete with some tinted concrete sealer (decra-seal) that was left over from the concrete driveway project.

The last thing to do was to cut out the sod on the inside of the concrete ring, place some landscaping fabric down and fill it up with black mulch.

I am very pleased with how it turned out but I still have 18 more to go so that should keep me busy for the next 3 weeks!

Pictures:

My first attempt at creating a form out of 1/8" hardboard
Closeup
Another closeup. You can see the metal wire I used to tie the borders to the supporting pieces of wood
Welding the hooks to one half of the small ring
Close-up of the hook used to hold up the ring
I used 6 for the small ring and 8 for the larger ring
Laying it out on the shop floor to ensure it's nice and round
Close-up of how I joined the two halves by using one piece of supporting wood to hold the rings up and together
Another close-up of a regular support
Metal spacers to keep the rings nice, round and parallel
A close-up of the spacer
Another view
The cherry tree almost ready for the concrete
Spacers in place, ready for the concrete
After the concrete was placed and trowled out
A view from a little farther apart
After the concrete has cured for two days and the forms have been removed
You can see the texture really nice in this picture
A close-up of the finished concrete
Using a 3' diameter piece of tar paper folded in half, in half, and in half again to give 8 equal parts to space out the expansion joints evenly (and yes, I aligned them with the cardinal directions)
After the expansion joints were cut
A view of the whole tree


A view from the upstairs window

Tools:
Angle grinder
MIG welder
Drill
Pick axe
Shovel
Wheel barrow
Circular saw
Extension chords
Measuing tape
Pencil
Ear muffs
Protective eye wear
Diamond blade for angle grinder
Knife
Table saw
Side cutters

Materials:
Marking spray
40' of 1.5" x 1/8" flat iron
4" of 1" x 1" angle iron cut into 1/8" pieces for hooks
Scrap wood
Scrap laminate flooring
Wire
Gravel, sand & cement for concrete

Cost:
Metal forms: about $30.0
Each tree ring: about $5.00 for the concrete

Time:
Making the metal forms: about 2hrs
Each tree ring: about 2-3hrs

Savings:
No idea how much it would cost to have a landscaping company make these but I'm guessing at least $200 per tree which would come out to about $4000 in total.

Conclusion:
Love it, makes it SO much nicer and neater to look at now!

Followers